Navigate Reports: Final Grades and Part-of-Term Grades
With grades now posted in RamPortal, you can generate reports in Navigate to view part-term or full-term grades. Here's how to get started and make the most of your reporting options!
Getting Started
- Log in to Navigate.
- Click on the Report Icon
 on the left navigation panel.
 - Go to the Standard Reports tab.
- Scroll down and select Students Enrollment Report—this will open a new page.
Report Options
- Create a Student List by Department
- Create a Student List for Specific Courses
- Create a Student List for Part-of-Term Grades
Report Instructions
Final Grades by Department
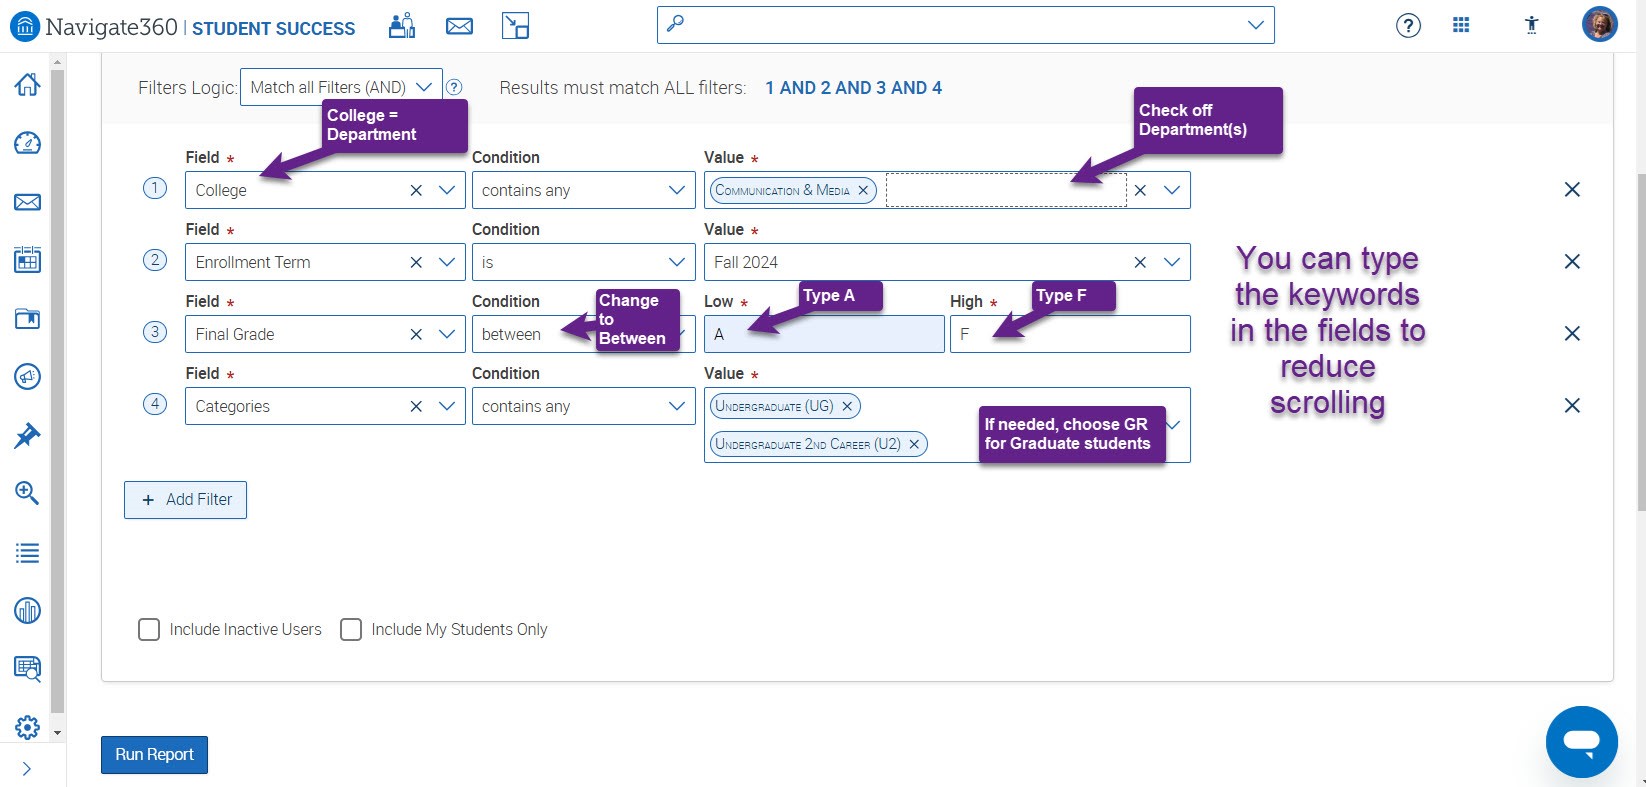
- In the “Field” dropdown, select College to choose a department.
- Condition: Defaults to contains any.
- Value: Choose the department name.
- Click +Add Filter.
- Add the Enrollment Term:
- Condition: Defaults to is.
- Value: Select the term.
- Add the Final Grade filter:
- Condition: Change to between.
- Value: Enter A as the low grade and F as the high grade (this will include A, A-, B+, B, etc., down to F).
- Click +Add Filter.
- Add the Categories filter:
- Value: Choose UG (Undergraduate), UG2 (Undergraduate 2nd Career), or GR (Graduate).
- Click Run Report and review your results.

Final Grades for a Specific Course (Including Part-of-Term Grades)
(Note: Students may appear multiple times since grades are tied to specific courses.)
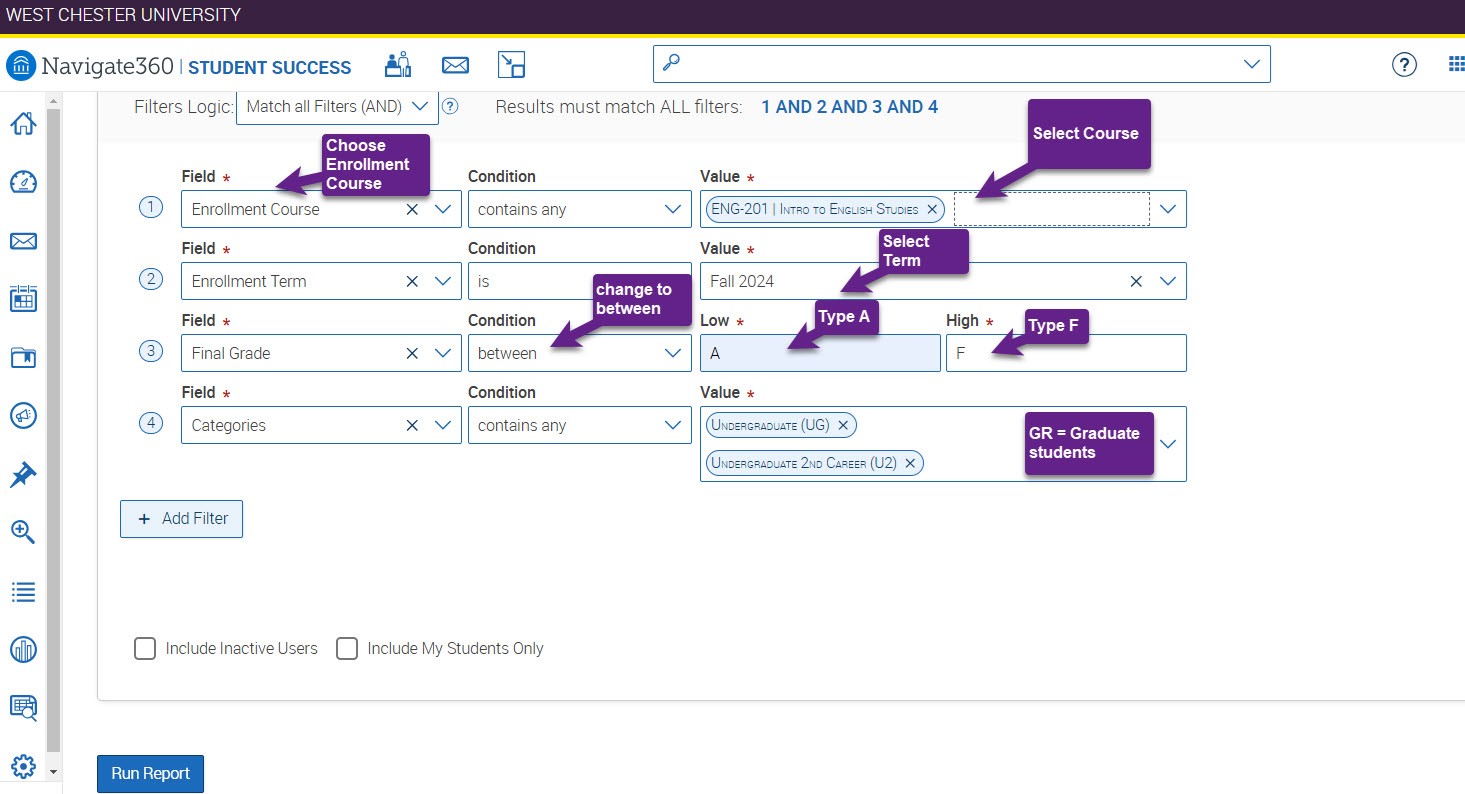
- In the “Field” dropdown, select Enrollment Course:
- Condition: Defaults to contains any.
- Value: Choose the course.
- Click +Add Filter.
- Add the Enrollment Term:
- Condition: Defaults to is.
- Value: Select a previous term.
- Add the Final Grade filter:
- Condition: Change to between.
- Value: Enter A as the low grade and F as the high grade.
- Click +Add Filter.
- Add the Categories filter:
- Value: Choose UG (Undergraduate) and UG2 (Undergraduate 2nd Career) or GR (Graduate).
- Click Run Report and review your results.

Saving and Managing Your Reports
Save Your Report
- Once you're satisfied with the results, click Save As

- Use a descriptive name that includes the values you used in your search for easy identification.
- Your report will be stored in the My Saved Reports section of Reporting

- To rerun the report later, click on its title and then click Run Report for updated results.
Manage Your Columns
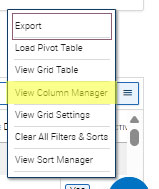
- Click the "hamburger button" at the end of the report (right side) and scroll to
View Column Manager.


- A list on column headings will appear.
- Uncheck the heading(s) you want to remove from your report.
- Click on the "View Grid Settings" or "Run Report" again to see the changes.
- Oops - need to add in another data column! You can add in any deleted columns, by clicking on "View Column Manager" and check-off the columns you want to add to your report.
- Use the Save As button to update any changes.
Communicating with Students
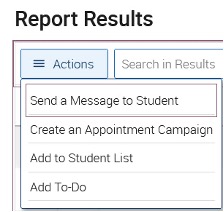
Once you have a list of students, you can use the Actions Menu to communicate with them directly.

- Check the box next to specific students or use the Select All option at the top to include all students on the list.
- If your list contains more than 100 students, click the Select All option at the bottom to include everyone.
- Use the Actions Menu dropdown to choose your desired action, such as sending an email or exporting the list.
Let me know if you have any questions or need further clarification. Email navigate@wcupa.edu for technical assistance. Happy reporting!
